Mobile Rider App
Why download Tripshot?

Reduced (or free) member fares and multi-ride passes are only available through the Tripshot app.

You can board without the app—but you’ll need to use exact bills/change to buy a single-ride, full public fare.
Plus, the app also tracks your shuttle, plans your trips, and sends you real-time notifications.
Quick Start Guide
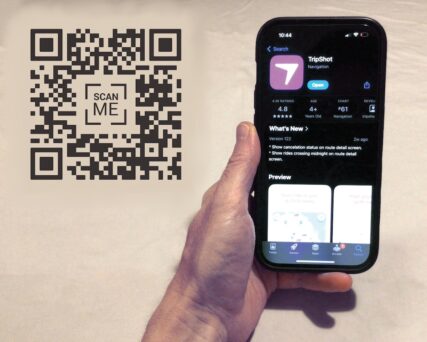
1. Download the app.
Scan the QR code above, use this Tripshot download link, or search Tripshot in your app store to download.
Open the app and search for The Grid.
Tap Sign up to create an account. If you qualify for reduced fares, use your work email address.
Check your email for the confirmation link. Then follow the prompts to finish setup. When asked, allow location and notifications.
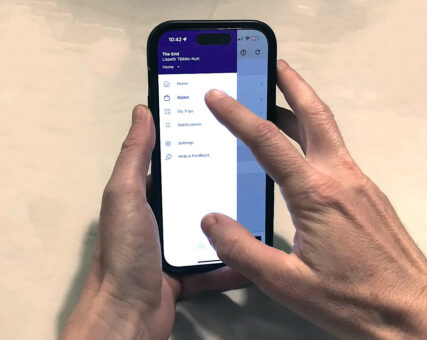
2. Set up your wallet.
If you qualify for reduced fares, get approved before purchasing passes.
Open the main menu (three horizontal bars, upper left) and tap Wallet.
To buy single- or multi-ride passes, tap Passes, then the plus sign (+, upper right) to view the Grid pass catalog.
Or tap Balance to add funds to your wallet. Use them later to buy passes or directly withdraw the cost of a single ride at boarding.
3. Board the shuttle.
With Bluetooth: As your shuttle approaches, open Wallet and choose your shuttle from Nearby Vehicles.
Without Bluetooth: Find the QR code inside the shuttle door. Open Wallet and tap Board by scanning QR code. (Scan from within the Tripshot app, not using your camera.)
Either way, Tripshot will activate one ride from your “unactivated” passes. If you have no applicable pass, Tripshot will deduct a single-ride fare from your Balance.

More Ways to Use Tripshot
- From the Tripshot home screen, tap the Routes icon.
- Select your route.
- Tap the heart in the top right corner. This ensures that time-sensitive information reaches you.
- There are three ways to begin planning a trip:
- Explore the map on the home screen, tap any stop, and then tap Directions.
- Tap Where would you like to go? from the home screen to enter a destination or pick from the full Grid stop list.
- Or tap Trip Planner from the home screen.
- By default, the app uses your current location as the origin. You can change it to a connecting station or any other location.
- If shuttles aren’t running, you’ll see “No route on a shuttle service could be found.” Tap Depart now to choose a time within Grid service hours.
- If your origin or destination isn’t a Grid stop, your trip will include a walking, biking, or driving segment. Again tap Depart now to switch between walk, bike, or drive for those non-shuttle legs.
- To save a frequent trip, tap the heart icon. You can access saved trips under Favorites on the home screen.
- Tap any of the listed trip options to view a map and detailed timetable. From this screen, tap the alarm clock icon to set up departure-specific trip alerts, which Tripshot calls Route Subscriptions.
- Notifications (which Tripshot calls Route Subscriptions) can be set up from the Trip Planner.
- Tap the trip you’re interested in to see a map and detailed timetable. Swipe up to minimize the map and view the full timetable.
- Tap the alarm clock icon to set a notification for that specific departure.
- Notifications can also be set up by tapping Routes on the home screen.
- Select the route you intend to ride.
- You can toggle between inbound and outbound using the wiggly arrow icon.
- Select your intended trip time and departure time.
- Tap the alarm clock icon to set a notification for that specific departure.
- From the Route Subscription screen, you can choose:
- how late the shuttle must be before a notification is sent;
- whether to be notified when the vehicle is approaching;
- one-time alerts for a specific date or an ongoing subscription;
- which days of the week to receive alerts;
- delivery method: text message, push notification, or both.
- Tap Save to confirm.
- To view, edit, or delete your alerts, return to the home screen and open the main menu (three horizontal bars, upper left) and tap Notifications.
- From the home screen, tap Routes.
- Select your intended route to open its map and schedule.
- When the route is in service, you’ll see the vehicle on the map and can watch its progress in real time. If no vehicle appears, the route may be between trips or out of service.
Common Tripshot Questions
Yes. If the reduced member fare on your route is $0—or if your employer is enrolled in our fare-free boarding program and covers the cost of your fare—you still need to download Tripshot and set up your Wallet (using your work email) so your member affiliation can be approved. At boarding, Tripshot will automatically issue a fare-free activated pass without any payment being charged. Learn more about the reduced fare approval process.
- Check your spam or junk folder. The message may have been filtered.
- Add Tripshot to your Safe Senders list. Mark no-reply-at-tripshot-dot-com as safe, then resend the confirmation.
- Still no email? Contact us. In most cases, your company server’s security settings are blocking the message.
- Verify your member-eligibility. Check our Current Members list to see if your worksite, residence, or office address is an eligible member location.
- Triple-confirm your email address. Make sure you’ve used a valid company email address with no typos.
- Still not working? Contact us for assistance.
- Confirm your email. The email on your Tripshot account must exactly match the one your member representative submitted.
- Allow processing time. Reduced-fare access is updated manually by the 128BC team. Please allow one full business day after account creation. Any full-fare rides taken during this window are eligible for reimbursement via Tripshot Wallet credits.
- Still not working? Contact us for assistance.
Next Step: Sign up for route emails.
Finish your Grid setup by subscribing to email alerts for the route(s) you ride. We’ll only send need-to-know updates like schedule changes, service interruptions, and weather advisories. No spam, just the essentials.
I’m Ready for Email Signup